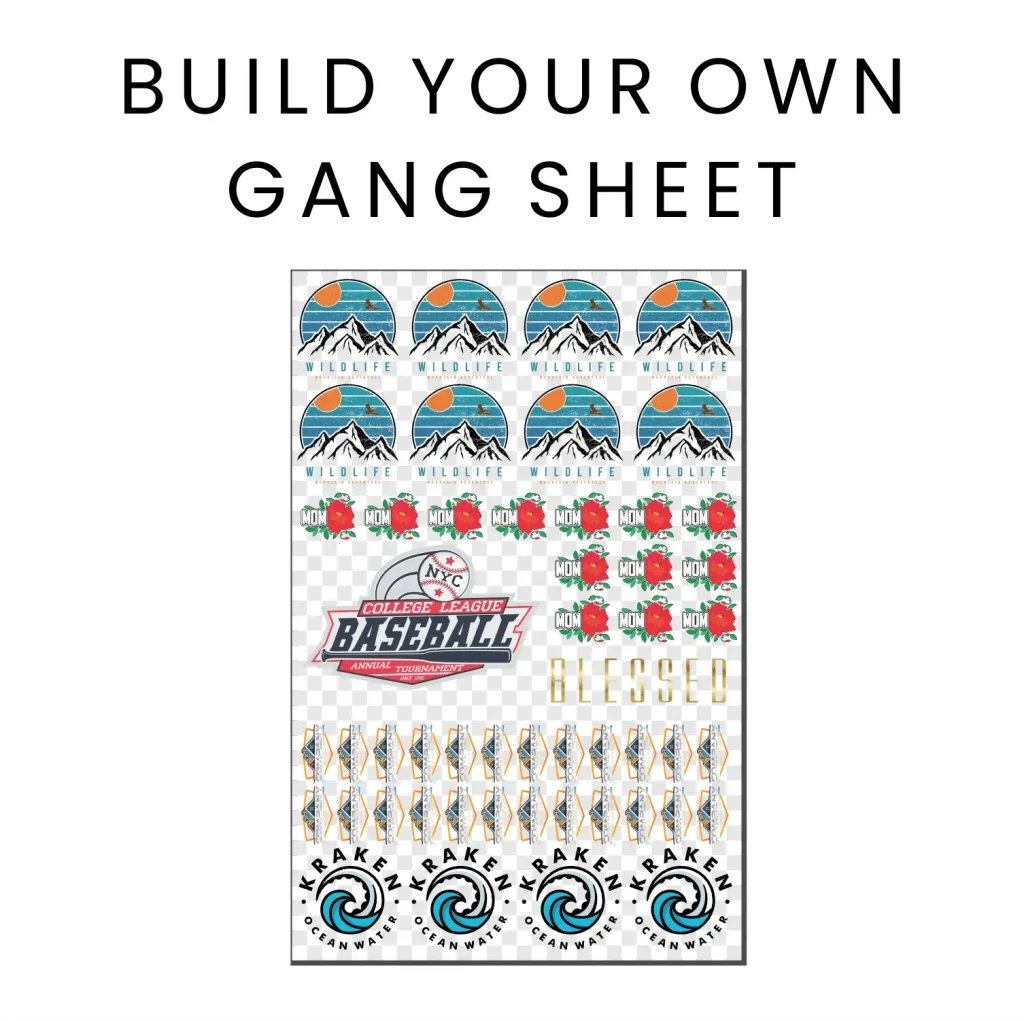
DTF Gangsheet Builder has redefined how shops orchestrate designs for transfers, turning complex multi-design layouts into a single, production-ready sheet that fits neatly into a scalable workflow and helps teams move from planning to production with confidence. This powerful tool saves time, reduces material waste, and helps ensure color accuracy across garments, so you can deliver reliable results on every order while maintaining professional standards and predictable production costs. By automating alignment, spacing, and output prep, it lets you focus on creativity and throughput rather than repetitive setup, enabling tighter production schedules, fewer bottlenecks in busy periods, and smoother handoffs to the finishing stages. Whether you’re just starting with gang sheets or facing a live production line, this solution supports faster planning, better consistency, and scalable workflows that adapt to growing orders and changing substrates. If you’ve wondered how to streamline your DTF operations while keeping quality high, the right tool makes the difference between guesswork and dependable results.
Think of it as a smart blueprint that groups multiple designs on one transfer sheet, turning bulk orders into organized, predictable outputs. The core idea is layout optimization: maximizing usable space, maintaining safe margins, and ensuring consistent ink density across every item in the batch. Reliable color management, alignment accuracy, and efficient handoffs to RIP software are central to a smooth printing pipeline. When you approach gang sheets with this mindset, you unlock faster turnarounds, reduced waste, and easier scaling as demand grows.
Maximize Throughput with Efficient Gang Sheet Optimization for DTF
Efficient gang sheet optimization directly boosts production throughput by packing more designs onto every transfer while minimizing waste. When layouts are planned with safe zones, margins, and consistent spacing, you reduce the number of production cycles and the likelihood of reprints. This translates to faster turnarounds and a more predictable DTF printing workflow, especially for high-volume runs.
In practice, optimization means considering each sheet as a production unit: how many designs fit, how ink density is balanced across items, and how to standardize calibration from design to transfer. By prioritizing density without compromising image quality, you create scalable processes that keep color accuracy intact across batches and orders. The result is a more reliable path from concept to finished garments or accessories.
How to Create Gang Sheets for DTF with the DTF Gangsheet Builder
If you’re asking how to create gang sheets for DTF, a modern approach starts with gathering print-ready artwork and a clear plan for sheet size and layout. The process emphasizes preparing files at high resolution, choosing the right color mode, and mapping designs to a grid that maximizes usable space. This mindset aligns with best practices for effective gang sheet creation and sets the foundation for a smooth production run.
Using the DTF Gangsheet Builder accelerates this workflow by automating alignment, spacing, and export prep. With templates, auto-spacing, and batch processing, you can test multiple configurations quickly and reuse successful layouts for repeat jobs. This tool helps you move from concept to print-ready sheets while maintaining consistency across items and orders.
DTF Printing Workflow: From Design to Production with Smart Layouts
The DTF printing workflow benefits greatly from smart, repeatable layouts. By planning a gang sheet that fits your printer’s capabilities and your substrate requirements, you minimize setup time and reduce waste. A well-structured workflow ensures that each print run proceeds with minimal interruptions, from file preparation through transfer to post-processing.
Previewing color, verifying margins, and ensuring proper alignment before sending files to the RIP or printer are essential steps in a reliable DTF printing workflow. When layouts are designed with color management in mind and export options that suit your equipment, you achieve consistent results across batches and substrates, which strengthens customer satisfaction and production efficiency.
Templates, Alignment, and Automation: Building Reusable Gang Sheets
Templates, alignment guides, and snapping tools are the backbone of repeatable gang sheet production. By using templates, you can quickly reproduce proven layouts for similar orders, which reduces decision fatigue and errors. Alignment features ensure even rows and columns, helping keep spacing uniform and prints visually consistent across the sheet.
Automation capabilities, batch processing, and multi-design export further streamline operations. Saving layouts as reusable templates supports faster turnarounds while preserving accuracy, color consistency, and spacing across multiple pages or sheets in a single project.
Color Management and Previews: Ensuring Consistent Results Across All Designs
Color management and accurate previews are critical to delivering consistent transfers on every item. Simulating color output before printing helps you anticipate shifts and correct them in advance, which reduces waste and reprints. A robust preview workflow lets you verify how each design interacts with others on the same sheet, ensuring overall harmony in the final run.
Maintaining a unified color profile across all designs on a gang sheet minimizes discrepancies between items. By taking advantage of color verification tools, you can align ink density and calibration across designs, delivering predictable outcomes for customers and smoother production from file to substrate.
Avoiding Common Pitfalls in Gang Sheet Production
Even with powerful tools, common mistakes can undermine efficiency: mismatched file sizes, overlooked bleed areas, and inconsistent margins that cause cropping or misalignment during transfer. To avoid these issues, verify sheet size rules before import, enable automatic bleed checks, and use the preview tool to confirm final positions.
Proactive practices like saving templates for repeat jobs, documenting best practices for the team, and maintaining organized export versions help sustain a high-performing workflow. By treating gang sheet creation as a repeatable process rather than a one-off task, you reduce errors, improve throughput, and keep color quality consistent across orders.
Frequently Asked Questions
What is the DTF Gangsheet Builder and how does it improve the DTF printing workflow?
The DTF Gangsheet Builder is a production tool that streamlines gang sheet creation within the DTF printing workflow. It automates alignment, spacing, margins, and output prep, and it provides color management previews and templates to speed production and reduce waste while keeping color consistent across sheets.
How does the DTF Gangsheet Builder optimize gang sheet layouts for batch designs?
For gang sheet optimization, the builder auto-calculates safe zones, bleed, and margins; offers alignment guides and snap-to-grid; supports batch processing and export; includes color management previews to verify output across all designs on a sheet.
How to create gang sheets for DTF using the DTF Gangsheet Builder: a step-by-step guide?
Step 1: gather artwork (300 dpi+ and correct color mode). Step 2: set sheet size, margins, bleed, and safe zones. Step 3: import and position designs with snap-to-grid. Step 4: resize, rotate, and batch optimize for consistent spacing. Step 5: preview for color and alignment. Step 6: export print-ready files. Step 7: run a test print and adjust as needed.
What common pitfalls should I avoid in the DTF printing workflow when using the DTF Gangsheet Builder?
Common pitfalls include mismatched file sizes, overlooked bleed, and inconsistent margins that cause clipping. Avoid them by verifying sheet size, enabling automatic bleed checks, using the preview tool, and saving templates for repeat jobs.
Can I reuse layouts for repeat orders with the DTF Gangsheet Builder, and how do templates help?
Yes. The DTF Gangsheet Builder supports templates and versioning to reuse layouts for repeat orders. Save layouts as templates, reuse successful configurations, and maintain consistent spacing and color across batches to accelerate turnarounds.
How should I export and prepare print-ready gang sheets for different RIP software and printers in the DTF workflow?
Export print-ready gang sheets by choosing formats compatible with your RIP software and DTF printer, and keep multiple versions for different equipment. Do a test print to verify margins and color balance, and ensure correct color profiles to maintain consistency across substrates.
| Aspect | Key Points | DTF Gangsheet Builder Role |
|---|---|---|
| What is a gang sheet? | – A gang sheet is a single transfer sheet hosting multiple designs in a grid or custom pattern.n- In DTF printing, one gang sheet contains many artwork placements that transfer to separate garments.n- Benefits include faster production (fewer setup cycles), lower material waste (more designs per sheet), and easier color management (standardized ink density and color calibration across all designs on the sheet). | A core concept in DTF production; the builder is central to creating optimized gang sheets, automating placement, spacing, alignment, and export to ensure consistency and efficiency. |
| Why it matters in the DTF workflow | – The layout affects printer efficiency, ink usage, and batch-consistency.n- Poorly arranged gang sheets can cause extra sheets, wasted film, or misaligned items.n- For scaling, optimizing gang sheets is essential; automation and previews/export in the builder support a smoother production path. | The DTF Gangsheet Builder automates layout decisions, previews, and exports, directly supporting speed, waste reduction, and color consistency across designs on a sheet. |
| Key features of the DTF Gangsheet Builder | – Intuitive layout and drag-and-drop interface.n- Automatic spacing and margins.n- Template library and size presets.n- Alignment guides and snapping.n- Batch processing and multi-design export.n- Color management and preview.n- Versioning and templates.n- Export options and compatibility. | These features collectively support a robust, production-optimized workflow that improves speed, reduces waste, and maintains color accuracy across all designs on a sheet. |
| Step-by-step guide to using the DTF Gangsheet Builder | – Step 1 – Gather artwork and plan the sheet with print-ready files (e.g., 300 dpi, correct color mode, proper background handling).n- Step 2 – Set up sheet size, margins, bleed, and safe zones.n- Step 3 – Import and position designs using alignment tools.n- Step 4 – Resize, rotate, and batch optimize for space.n- Step 5 – Preview and verify color accuracy, margins, and alignment.n- Step 6 – Export print-ready files in compatible formats.n- Step 7 – Print test and adjust margins, color balance, or spacing as needed. | The builder simplifies complex, repeatable tasks, enabling faster, more reliable gang sheet production from planning to output. |
| Practical tips for best results | – Start with clean artwork (vector where possible; high-res raster).n- Maintain consistent color profiles across all designs in a sheet.n- Plan for post-processing (heat press and curing) to avoid distortions.n- Save templates for repeat jobs for faster turnarounds.n- Balance speed and accuracy to optimize usable space without sacrificing legibility. | Efficient templates and consistent workflows reduce errors and improve repeatability across production runs. |
| Common pitfalls and how to avoid them | – Mismatched file sizes and overlooked bleed areas.n- Inconsistent margins that crop designs during transfer.n- Not saving templates or documenting best practices.n- Skipping the preview step before export.n- Not testing across printers/inks when using multiple setups. | Always verify sheet size and margins, enable automatic bleed checks, use previews, and save templates to minimize human error in high-volume environments. |


